Showing posts with label Memory Box. Show all posts

Saturday, December 28, 2019

Dachshund Through The Snow

My daughter's friends have an adorable Dachshund named Olive and we occasionally get to spend time with her. So I knew just the card I wanted to make for them for Christmas.


The SVG file was free (possibly from lovesvg.com). I chose to cut around the silhouette and pop that up on the front of the card. To do this, I traced outside the entire dog in Silhouette Studio software and then erased all the cut lines from the body. 

I finished the bottom of the card with the Memory Box Frostyville Border die cut from glitter paper. I embossed with the same die across the envelope to keep with the theme. All in all, a fun card to make and give. I am entering this in the Cut It Up Challenge for White on White with a Pop of Colour.

I leave you with a photo of sweet Olive with her advent calendar:


Sunday, June 3, 2018

Freshly Made Sketches #339 X 21!


The Freshly Made Sketch was truly a challenge for me, geometrically speaking. My brain had difficulty getting these triangles just right, as you will soon see:
But I persevered and I made more cards in one day than I have ever made in my life; 21, to be exact! Of course, my favourite ended up being the very last one I made. Go figure.

They are all thank you cards (I currently need a lot), 4.25 X 5.5 inches and mostly different - I was just trying to use up scraps of patterned paper. Some are heat embossed, others are not. Some are more clean and simple and others got fussy. Here they are:

Washi tape strips. Verve stamp. Kaiser Craft paper.
These next cards have a masculine feel so I am entering one of them in the almost-ended Simon Says Stamp Monday challenge.
Waltzingmouse stamps. Memory Box dots and really old Basic Grey designer paper
I have been hoarding saving.


I thought this Waltzingmouse stamp was perfect! 
Memory Box papers, Avery Elle die cut "thanks." 
Stickers my sister gave me and I finally used. 

Lawn Fawn die cut pierced edge.
Washi tape sentiment. Easy peasy! 

The flowers on this paper dictated this flipped layout.
Waltzingmouse stamp, left, and Verve stamp, right. 
Different card bases; this Prima designer paper had so many colours to choose from.
Some glitter washi tape and a Quietfire Design die cut inlaid in card front. I had a mishap
with some StazOn ink so had to add a bit of shading around the top.
SaveSave

Sunday, October 8, 2017

WCMD Autumnal Card


Yesterday (Saturday) was World Card Making Day. To celebrate, stores had sales and some even had challenges. This card is for the Mood Board Inspiration Challenge over at Kat's Scrappiness. Here is the gorgeous board:

Here's my card:

I started by stamping the Memory Box Fresh Spring Wreath in Versafine Crimson Red and clear embossed it. Then I blended some Distress Oxide inks over the background and wiped off the excess with a tissue. The Lawn Fawn Party Animal fox and the chickie were coloured with Copic markers. Happy Birthday sentiment was printed and foiled in metallic purple. I added Distress Oxide to the card stock and splotched with water drops before mounting it and the bird with foam tape. A layer of green card stock mats the works and then it is mounted on a crimson A2 card.

Beside's Kat's challenge, I am entering this in the Seize the Birthday challenge. This view shows the embossed wreath a bit better. Thanks for visiting!


Monday, August 7, 2017

Parachuting Panda

How is your day going? Today is BC Day, so a statutory holiday for me. Yay! And I found time to make a birthday card using the My Favorite Things Happy Pandas stamp set.

This is a Clean And Simple (CAS) card that was inspired by the Splitcoastampers CAS challenge "Head in the Clouds." I started with a pale blue cardstock and created the clouds by sponging Distress Inks over the edge of Memory Box cloud die cuts. The banners and balloons are part of the set and I thought it might look like he is parachuting if I set him on the cloud background. I coloured things in with Copic Markers.
I will enter this happy little fellow over at Seize the Birthday Challenge Blog, as well. The challenge is to Tie One On and I made sure Panda's parachute is securely fastened!


Friday, August 26, 2016

Birthday Buddies

Here's a birthday card for my hubby. I used the Lawn Fawn Party Animals set I purchased on vacation in California this spring.

Dies- Grassy hills: Lawn Fawn; Marshmallow Clouds: Memory Box
So cute! I am entering this card over at

Seize the Birthday! They have an optional "toppings" to use tags and while I did not do so with this card, I hope to come back and add another later. Their design team has some great samples that have inspired me!


Thursday, July 9, 2015

Bird Crazy Brain Teaser


Can you see what's wrong with this card? I created a lovely watercolour background using Distress Inks and cut the clouds and tree branch from Memory Box dies. The Bird Crazy stamp was coloured with Copic markers and I fussy cut him out. I used a Dymo label maker and outlined the sentiment with a black Sharpie.

Still can't see the obvious error? I think the background is upside down! I think the blue should have been at the top (where the clouds are). Oh well, it was a funny little card for someone who is going through a lot of health challenges right now and so it hopefully made him smile and encouraged him, despite the faux pas!

Sunday, June 21, 2015

Happy Father's Day!

Here's a quick card. I had the watercolour paper leftover from another project. The stamps are Waltzingmouse and the clouds are Memory Box Dies. Tim Holtz Sizzix Embossing Folder for a background.
My daughter and her dad have automobiles in common. He washes them, changes the oil and checks the tire pressure; she drives them! Thought it was a good theme for today.

Monday, January 20, 2014

A Little Love


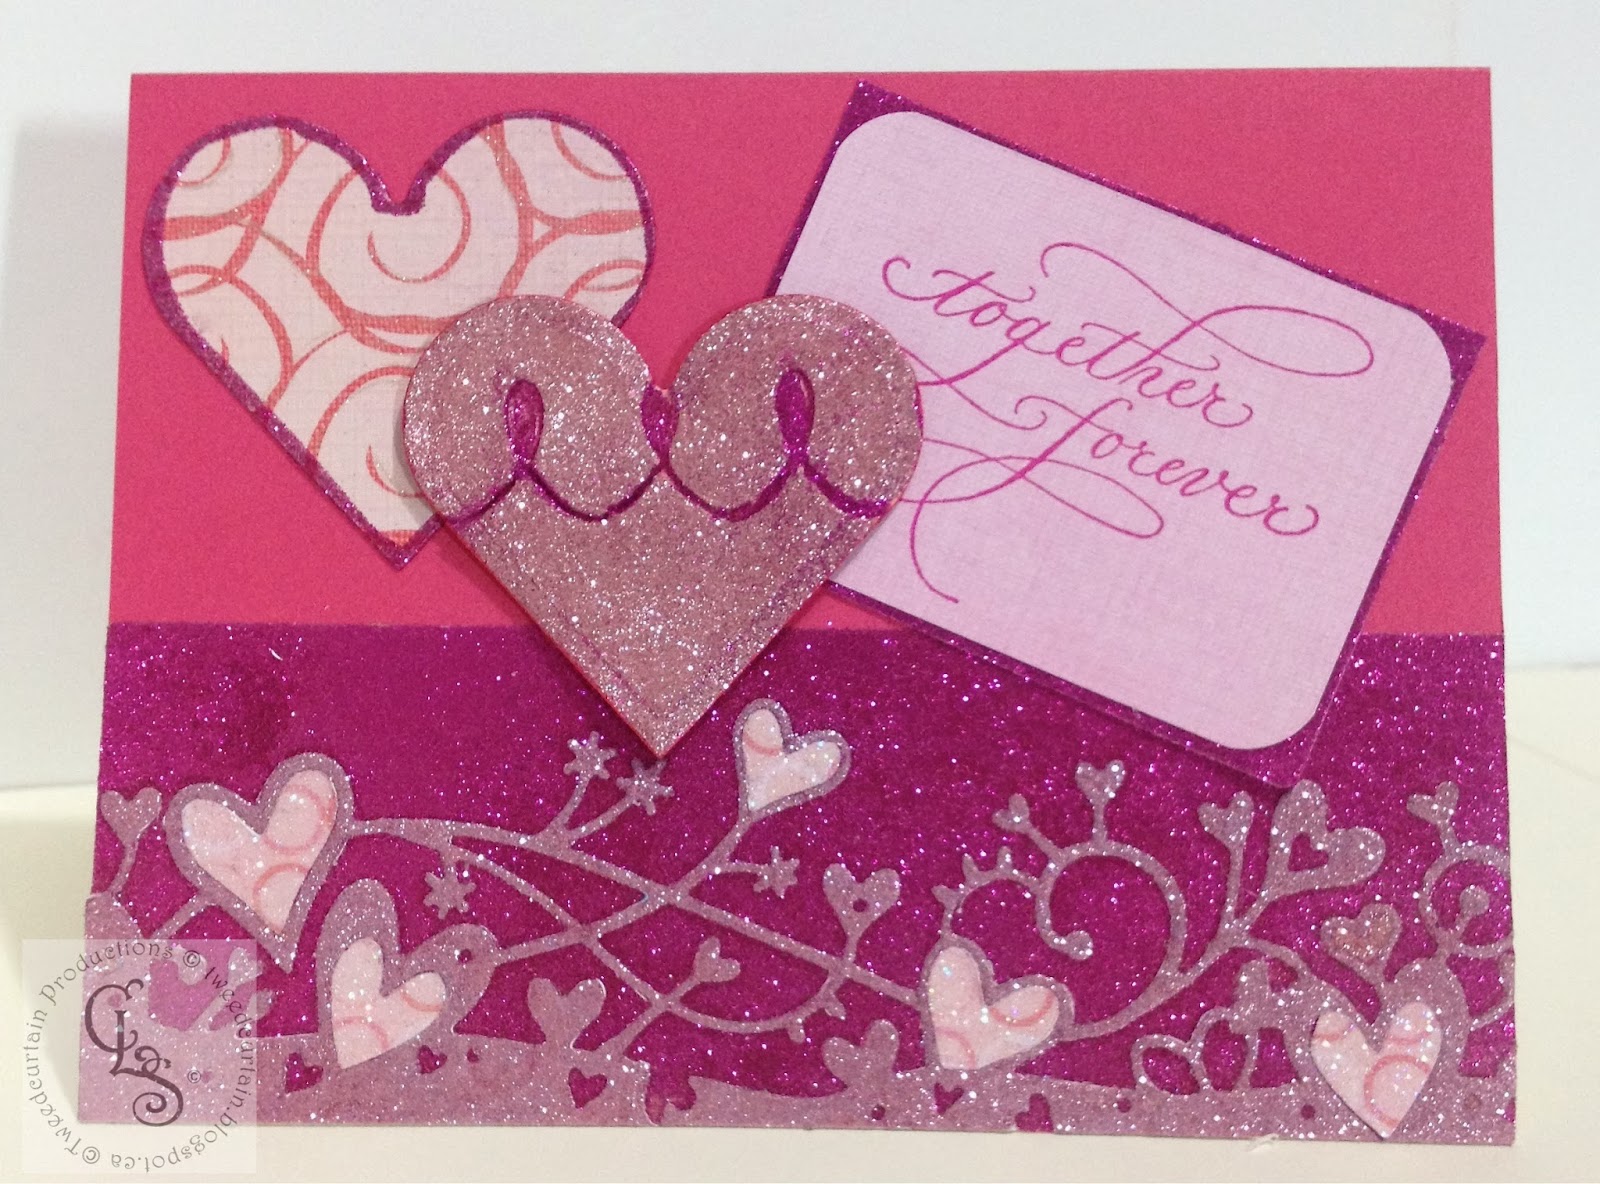
Hello, welcome to my blog today. I recently watched a video by one of those talented stars in the stamping world - Jennifer McGuire. She showed how to get more out of your dies by paper piecing remnants from one die cut into another. I was inspired to give it a go. I used a Memory Box Cherish Border die and cut it out of a number of cardstocks and patterned papers, both white and pink. 

For this card, I inserted patterned papers and then highlighted them with Ranger Glossy Accents. I stamped the Waltzingmouse sentiment, For You, in the lower corner. Clean and simple.

The "love" stamp is an oldie, but goodie, from Stampin' Up! I used patterned paper for the border and glittered the insets.

This last card is a riff on the Burnished Velvet technique. I die cut the border out of cardstock with double-sided Sookwang tape affixed to both front and back. This severely tested my Cuttlebug and I do not recommend it. It gave me the opportunity to easily glitter the border, and the background, and the insets. I then added a couple of hearts (Memory Box (modified) and Spellbinders) and the beautiful calligraphy stamp from Quietfire Design, stamped in StazOn Fucshia Pink. 

By the way, all these cards were made from Memory Box card bases. I get these from my local stamp store, Stampers!, and they are very good quality, with white insides and smooth as silk coloured outsides. Great weight - not flimsy. I like the saturated colours and the convenience of not having to cut and fold my own bases. Thanks for visiting today!


Wednesday, January 15, 2014

Fanatics with Fabric

The current Waltzingmouse Fanatics Challenge is to use fabric on your card. I chose to use white tulle, which is a slightly stiff net material. All stamps by Waltzingmouse Stamps unless otherwise noted.

Card 6.5 X 5 inches
I stamped a white card base and clear heat-embossed, then rubbed Broken China Distress Ink over all to make the stamping pop. I layered on a swatch of turquoise patterned paper that I "knocked back" with white Picket Fence Distress Paint. A couple of stitched ribbons trimmed the panel.
I adore the pearly hat and stick-pins that Jeanne Jachna sent me a year ago.
I used them with a memo pin from Tim Holtz and a wee stamped tag to embellish the tulle flower.
I die cut (Memory Box) a ticket-shaped piece of pearl cardstock and wrapped a distressed dictionary page around the middle, then stamped and heat embossed sentiments on each end. Six layers of tulle were die cut (Tim Holtz Sizzix Tattered Florals) to provide a focal flower. I placed a piece of the patterned paper behind a clear acrylic button to accent, along with baker's twine.  

Postmark is a Stampington & Co. stamp; above it is a digital 'print and cut' from the Silhouette Online Store.


There is a whole week left to play in this challenge so check it out at the Waltzingmouse Fanatics Challenge blog.

Monday, March 11, 2013

Hearts for Christmas


Sylvia has a Christmas Card Challenge on her blog, and for the month of March, the challenge is to use a heart on our Christmas cards. Do click on the link and see her gorgeous, elegant pieced and embossed heart card. Stunning!

I am behind on my goal of pre-making Christmas cards this year, and coincidentally, the February Waltzingmouse Stamps Christmas Card Challenge was *also* to use hearts. I was very inspired by Sylvia's heart, and decided to try my hand at that piecing and embossing technique. I die cut four Memory Box hearts out of four different printed papers, then sliced them all the exact same way and shuffled the pieces around. Once I taped them together, I added a bit of faux stitching with a marker and ran them through my Cuttlebug in an embossing folder, then hit the raised areas with some Distress Inks. I am sharing three cards from this slicing and dicing. The jury is still out on the fourth one I made - something to do with a new glitter glue and I not seeing eye to eye!


I recently acquired some Pink Paislee City Sidewalks Collection papers and love their retro feel so used them for all the cards. The "Keep Christmas in your heart" is a Waltzingmouse Stamp. The red and white baker's twine-accented button is actually die cut from cardstock using a My Favorite Things die.

The branch and holly berries are created with a Memory Box die for this second card. I am entering this one in the weekly Christmas Card Challenge. The strips of cardstock are there, if you look closely.

I tried creating my own banner instead of using a die cut banner. None of my dies were exactly the size I needed, and I wanted a striped border. I was surprised I still knew how to use scissors!
And last, but not least, I hearkened way back to Grade One in Lord Nelson Elementary School, where the teacher let us play with chunky silver glitter to create Christmas crafts. Whenever I use this Martha Stewart silver glitter I am transported back to that classroom.
Again, I created my own banner and the pennants with scissors. My Grade One teacher would be beaming with pride now!