Showing posts with label WMSC. Show all posts

Thursday, January 17, 2013

Waltzingmouse Blog Party - LOVE

It's January 17 and that means it is time for the monthly Waltzingmouse Blog Party.
The theme is LOVE and I was feeling pretty literal! Some scraps of Shimmer Sheetz and silver bullion accent this random collage. Head over to the party blog to see what everyone else came up with this month!

Thursday, January 3, 2013

My WMS Sketch Challenge Faves

Stamper extraordinaire Pauline Pollington had a fun idea to go back and revisit some of her own cards that she has posted in the past for the weekly Waltzingmouse Sketch Challenges (which are sadly ending this week). You must go see her post - she does truly beautiful work.

This got me wondering about my own WMSC entries and I took a gander. I was surprised to see that I entered the very first of the WMS sketch challenges with this card, which also uses some WMS digital paper (photo captions link to my original posts):

WMSC1
The sketches were always slightly challenging, but never felt overwhelming or too complicated. There are a couple of other cards that have a special place in my heart. This one - because it was made with recycled yogurt foil seals and GLOWS in real life:
WMSC9

This one, because of the odd colours and that the layout is unlike anything I have ever done before or since:

WMSC82

This card, because it was for my daughter's birthday and *she* *really* *likes* it!
WMSC86
This card, because I actually won a "Top Mouse" award on the WMSC blog with it, and was so honoured and surprised:

WMSC88
A recap would not be complete without at least one Christmas card, because WMS are really famous for their Christmas stamps. This was a difficult one to choose as I often used the sketch to create a Christmas card.  I think this is my fave from that lot, though, and it is because it is so unusually pink, which is atypical both for Christmas and for me:
WMSC120
My very first time ever to follow a sketch for a card design was in April 2010, just a few months before WMSC started up. I remember thinking it was so strange - perhaps even cheating - after always winging it on my own, but I have since come to think of sketches as creative kindling, giving me the opportunity to stretch and try new things I might never have tried otherwise. The good news is there are now 129 sketches saved in the Waltzingmouse  Stamps gallery, so any time you (or me!) are feeling less than inspired, check them out!

Sunday, December 30, 2012

End of an Era- WMSC129

It is the last weekly Waltzingmouse Sketch Challenge ever and so to commemorate this sad occasion I managed to make a card. I will miss the weekly inspiration. Although I often did not have time to enter I always checked it out and enjoyed seeing the creations by the Mischief Makers and fellow WMS fans. 

The 129th sketch is courtesy of Edna Morrisedie:
Here is my card:
My daughter requested a birthday card for a friend who likes all things French and feminine, so I was able to have some fun with a number of Waltzingmouse stamps.
I even made a beaded stick pin, with a hanging doodad. This was from a deconstructed wine glass marker found in the big box store clearance bin.

The paper flower is a dollar store find, and I sprayed a wee bit of shimmer mist across it. A little peek inside to show that I sometimes dress up the insides of cards, too. Farewell, WMS Weekly Sketch Challenge. I look forward to seeing what Claire dreams up for 2013 to keep us busy.

Sunday, November 4, 2012

Distress EP, Dreamweavers and WMS Sketch

For this Christmas card, I tried a new technique using a Dreamweavers snowflake stencil, some regular stencil embossing paste, and Rangers Tim Holtz Distress Embossing Powder in Tattered Rose.

I used this week's Waltzingmouse Sketch Challenge for the design, but opted to put the borders top and bottom instead of on the sides. Here is the sketch:

And here is my "distressed" card:
My first step was to take a plain white piece of lightweight cardstock and tape the stencil in place in the middle. Then I spread the paste over the stencil and scraped off the excess. I lifted up the stencil, then applied the Tattered Rose Distress Embossing Powder. I let it dry, then heat embossed the powder to assure good adhesion. The texture is very unique - sort of sand-roughened.

I used my foam sponge blending tool and applied various Distress Inks to the cardstock: Antique Linen in the center and Salty Ocean and Broken China moving outward. A moistened swab was used to remove any ink from the snowflake. I cut the ornament shape (Spellbinders Heirloom Ornaments 2011) from the center and inserted a pearl brad, then traced around the die on a scrap of cardstock and cut out a shadow layer. I treated it with the same Distress EP on the edges and layered the snowflake piece on top.

The inked up cardstock with the ornament hole in the center was too pretty to discard, so I ran it through my die cutting/embossing machine with the Sizzix Tim Holtz Postcards embossing folder. I highlighted the raised lettering with Tattered Rose and Antique Linen Distress Inks. With the shadow layer under my snowflake, I could use pop dots to adhere it back on the background with no cuts showing.


I have a few precious pieces of cobalt blue Italian silk cardstock and used one to border the ensemble. Before layering, I die cut a very large piece out of the center so that it is mostly just the visible border that was used. No sense wasting that goodness underneath!


I embossed the Waltzingmouse vintage greeting, and border strips in a pearly embossing powder that echoes my thin border. I added a "Mini Me" Waltzingmouse ornament just for fun. The card base is cream but I treated it all with Tattered Rose Distress Ink to tie it all together. Ranger and Dreamweaver are showcasing techniques using the Distress Embossing Powders and the stencils, and there are prizes! Check out these links for more information: Dream it Up Blog and the Ranger blog. And while you are at it, create a card for the Waltzingmouse Sketch Challenge. You don't even need to use WMS stamps to play along!

Monday, October 22, 2012

Pink for Christmas

The Waltzingmouse Christmas Card Challenge for the month of October is Pretty in Pink. I cannot recall if I have ever made a pink Christmas card before, so this seemed daunting, but the pretty Opera Tags stamp and die set inspired me with the opera curtain and the feminine shape.

This card was just a series of experiments that came together in the end. I was thinking of Moulin Rouge and can can dancers and sort of shabby, vintage ladies' budoirs when I was making it. 

The silky rayon bow is made from a Martha Stewart ribbon. It is quite thick and I used the simple, nifty bow tip I shared in this post to create it. I like how it is fraying a bit at the ends.

The ornament has the word Joyeux above Noel (from the Say It Loud Winter Holiday set) and if you click on this photo you might be able to make it out! I stamped the acetate layer with Fuchsia Pink StazOn ink and layered it over pink cardstock that I coated in iridescent glitter embossing powder. I tried stamping right on top of the embossed layer but it lacked definition, so the acetate jacket was the answer. Those two layers were added to a third fussy-cut pink layer that I ran a deep pink Copic marker around to create a border. The Spellbinders Frameabilities Classic Frame die cut was stamped with some sheet music and shaded with Antique Linen Distress Ink and highlighted with Memento Angel Pink.  
I created borders top and bottom with the ornate stamp from the Very Vintage Christmas set (still my all time favourite WMS stamp! Claire - when will you make a background stamp from that same design?)) and mounted them on more ribbon. I scored the pink base cardstock in a diamond pattern and dotted Diamond Stickles at each interestion to create some interest.

Very pink - not my favourite colour but I did my best to embrace the challenge! Thanks for stopping by today. Details on the WMS Christmas Card monthly challenge can be found in the WMS forum. I am also entering this card in the WMS sketch challenge.

Thursday, September 20, 2012

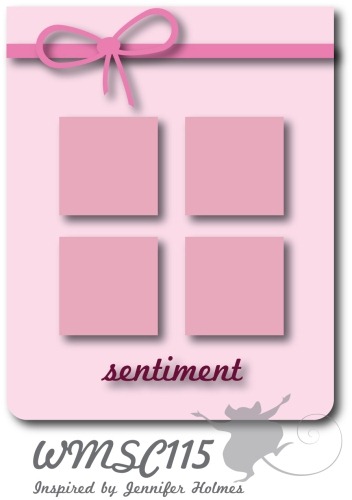
WMS Challenge #115


I'm dreaming of an orange Christmas... it's the 115th Waltzingmouse Sketch Challenge and I have used the wonderful sketch provided to create a sunny Christmas card. Here's the sketch:

And here's the card I made, using three different stamp sets from Ireland (Around Christmastime, 2011 Holiday Ornaments, Nordic Winter): 

This also satisfies the WMS Christmas Card Challenge for the month of July, in which we were to use some sort of shade of orange. I used Versamagic chalk-finish Mango Madness to stamp the ornaments and sentiment. I topped off the snowflake with an orange Swarovski heat-set crystal. Thanks for visiting today!


Thursday, June 7, 2012

100 Sketches!

Congratulations to Waltzingmouse Stamps Sketch Blog. They have posted their 100th Sketch Challenge this week. Here is the sketch:
I rotated the sketch slightly and used a couple of different stamps from Waltzingmouse Stamps for this pretty in pink card.
I paper-pieced the dress and added some pearls and clear glitter for posh highlights. My Spellbinders Nestabilities helped frame the dress.
Thanks for visiting. Be sure to go and see all the entries for this special centennial sketch challenge. 

Wednesday, April 18, 2012

Faux Postage


When you've been stamping 20 years or so, you tend to see a lot of trends come and go. Quite some time ago, faux postage was all the rage. At least one company came out with plastic stencils and rubber stamps to create the "grid" of postage sheets. I recall picking up a couple of these templates at my local stamp store many years ago. What I failed to do, however, was pick up the matching rubber stamps!

Fast forward to 2012, when I am once again in my local stamp store. (Stampers! just celebrated their 15th anniversary in business in Victoria BC Canada. In an industry that's seen so many failures and closures, it sure is nice to see them thriving. I try to do my bit...) Some kind soul had donated a bunch of her old stamps to the store to sell in random discounted lots in aid of a local animal shelter. I spied the Just For Fun diamond-shaped grid stamp that matched my stencil at home and snapped that up. After all, it is my duty to protect poor animals!

After stamping in black Staz-On ink, I masked off the grid with the plastic stencil and then sponged Dried Marigold and Barn Red Distress Inks in the windows. I stamped the French motifs in Ranger Black Archival Ink over top.

This border would make a fabby bookmark!
I stamped the French border and sentiment on white cardstock in Versafine black ink and thermal embossed in clear. I used the same Distress Inks to shade these pieces. I used Versafine Ink in Blue Lagoon to sponge-shade strips of cardstock mats (cut using my Perfect Layers tools) and stamped the chicken wire background in the same ink. This is an easy way to get coordinating cardstock! I used a Spellbinders Ribbon Banner to die cut the sentiment. All stamps (except for the grid and chicken wire) from the same Waltzingmouse set: French Country. The layout of the card is from this week's Waltzingmouse Sketch Challenge. Can you see it?

And speaking of my local stamp store turning 15, here is a little teaser about the card I made for that occasion. I'll reveal all in my next post!


Tuesday, April 10, 2012

Sweet Birthday Wishes


Time for another Waltzingmouse Sketch Challenge. Here's the sketch:
I recently got this great set of Compact Sentiment stamps and thought I'd make a birthday card to utilize this nice little greeting. The flowers are from the Eat Cake set. I layered the sentiment onto stripes stamped with the borders from the Off Beat Backgrounds set.

I made my festive banner pennants from triangles I cut free-hand and coated in Glitter Ritz micro-fine glitters, burnishing well into the double-sided tape. They sparkle so well in real life! A few layers, some raspberry twine and here we have it:

Tuesday, March 27, 2012

Rosette Tip and Christmas Cards

I have created a few cards for the March 2012 Christmas Card Challenge in the Waltzingmouse Stamps Forum, which is to use the colours blue and brown on our cards. In the process, I stumbled upon a clever way to help in the assembly of paper rosettes (near end of post).


My first attempt with this colour combination was only so-so. It's a card for Santa to leave behind on Christmas Eve. I adore the vintage border stamp that I used to create the background "wallpaper" with Vintage Sepia Versafine ink.

Not sure if you noticed, but the "tree" set is actually Santa's shoe! Here's the heel:

I tried again, using the current Waltzingmouse Sketch Challenge sketch for my layout. (See the two snowflakes in the background?)


You might notice this is a tad grungy. I am currently taking the Tim Holtz Creative Chemistry 101 online class, exploring techniques using a number of his products. When I made this card I was messing around with Distress Inks, so went a little crazy with the Vintage Photo and Walnut Inks! I used a new stamp that looks like striped ticking on the right hand side of the stamped background. Love that new stamp!

For my third and final Blue and Brown Card for Christmas I had the itch to make a rosette.

I happened to use a Tim Holtz die to make mine, but you can make these easy enough by accordion-folding a long strip of paper. For this card, I used two strips to create a large rosette. In doing so, I discovered a neat trick.

After I joined the ends of the long strip together, I needed to press down on the center of the vertical standing rosette to make it lie somewhat flat, and then attach an anchoring base such as a disk of paper to stabilize the rosette and maintain its circular shape. I tend to be all thumbs with this maneuver.

Inspiration struck! I spied a spool of tape on my table and realized the large circular opening would nicely corral my rosette, freeing up both hands to glue the base down. (I realize if you have not made a paper rosette, this won't make any sense. But for those of you who have, you'll get the "Aha!" moment I had.)

Spool of tape.
Creative Memories circle making tool.
The spool of tape worked well, but was a little large for my rosette, so I tried an acrylic Creative Memories Circle Template tool with a slightly smaller hole and it worked perfectly. 
Then I started looking around for other items, and this small roll of tape with a standard size hole was perfect for smaller rosettes. The circular shape holds the rosette snugly, and gives me the option of distributing my accordion folds evenly before glueing down the base piece (seen below in the upper right corner).


Hope this tip is helpful to you! Thanks for stopping by and scrolling all the way down here to the end!