Showing posts with label acetate. Show all posts

Friday, March 20, 2026

Best Fishes


Over at Seize the Birthday the current challenge #322 asks for the topping of:

This card is a standing card that has an accordion fold in the base to insert clear acetate layers. I added fronds of seaweed and stamped fish to compliment the die cut aperture. The back panel is a watercoliured background I created with smooshed Distress Inks and Lindy's Magicals powdered pigments.


The back of the tentfold card was embossed with waves and I added this sentiment:


Thursday, August 8, 2013

Festive Friday Card


I have been wanting to play along with the Festive Friday gals forever, but just no time. Luckily I am on vacation now and going nowhere, so I was able to play this week. The current theme is to use the element: Candy Cane. Here's my card: 


My candy canes are sitting in an acetate jar. Clever stamper Deborah Frings does a great job with the technique of stamping glass jars on acetate, then leaves little tabs when cutting out the image so that the tabs can be inserted in discreet slits in the card. This eliminates the need for adhesive and frees up the inside of the container to "hold" things! So thanks to Deborah for that technique, which I have been meaning to try. I used it for my jar and my lid. Stamps are all Waltzingmouse; sentiment is a rub-on.

I also created this card for a Splitcoaststampers DTGD Challenge for red and white, the A Simple Five Inspire Me Fridays Anything Goes Challenge, and Card a Day's August Challenge to use a die cut. Thanks for looking!


Saturday, May 11, 2013

Christmas Card Challenge: Glitter!

May is my month to host the Waltzingmouse Stamps Christmas Card Challenge and I have chosen Glitter! for our theme.

My challenge is to use glitter in some form or fashion. I made a few samples to share in the WMS forum. This one is using glitter under acetate.
Stamps: WMS Vintage Ornaments; Paper: Memory Box
I stamped on one side in StazOn Iris ink and then used clear drying glue to apply glitter to the underside. Here's a close-up:


I am a new Silhouette Cameo owner (sooo excited!), and one of the things I have been eager to try is cutting out masks for the Burnished Velvet technique. For the card below, I used the free Bright Season cut files bundle from WMS to create the scroll frame and lantern.
I applied Sookwang double-sided tape to plain cardstock. The Cameo blade cut out the top layer of liner, but not the tape or the cardstock. I peeled away sections of liner and applied glitter one colour at a time. Below you can see where two colours have been applied so far.

The entire card front, except for the leaves, berries and banner, is one layer of glittered-up cardstock. It is smooth to the touch (hence the term "velvet"). It's mounted on metallic copper cardstock.

My last card features a cut file from the Silhouette Online Store for the card base. I thermal embossed the poinsettias and frame with Carbernet Twinkle Embossing Powder. The glitter is a little more subtle here. 

I hope you will join us at WMS to make a few more cards for your Christmas card stash. Details can be found by clicking on the logo at right.

Monday, October 22, 2012

Pink for Christmas

The Waltzingmouse Christmas Card Challenge for the month of October is Pretty in Pink. I cannot recall if I have ever made a pink Christmas card before, so this seemed daunting, but the pretty Opera Tags stamp and die set inspired me with the opera curtain and the feminine shape.

This card was just a series of experiments that came together in the end. I was thinking of Moulin Rouge and can can dancers and sort of shabby, vintage ladies' budoirs when I was making it. 

The silky rayon bow is made from a Martha Stewart ribbon. It is quite thick and I used the simple, nifty bow tip I shared in this post to create it. I like how it is fraying a bit at the ends.

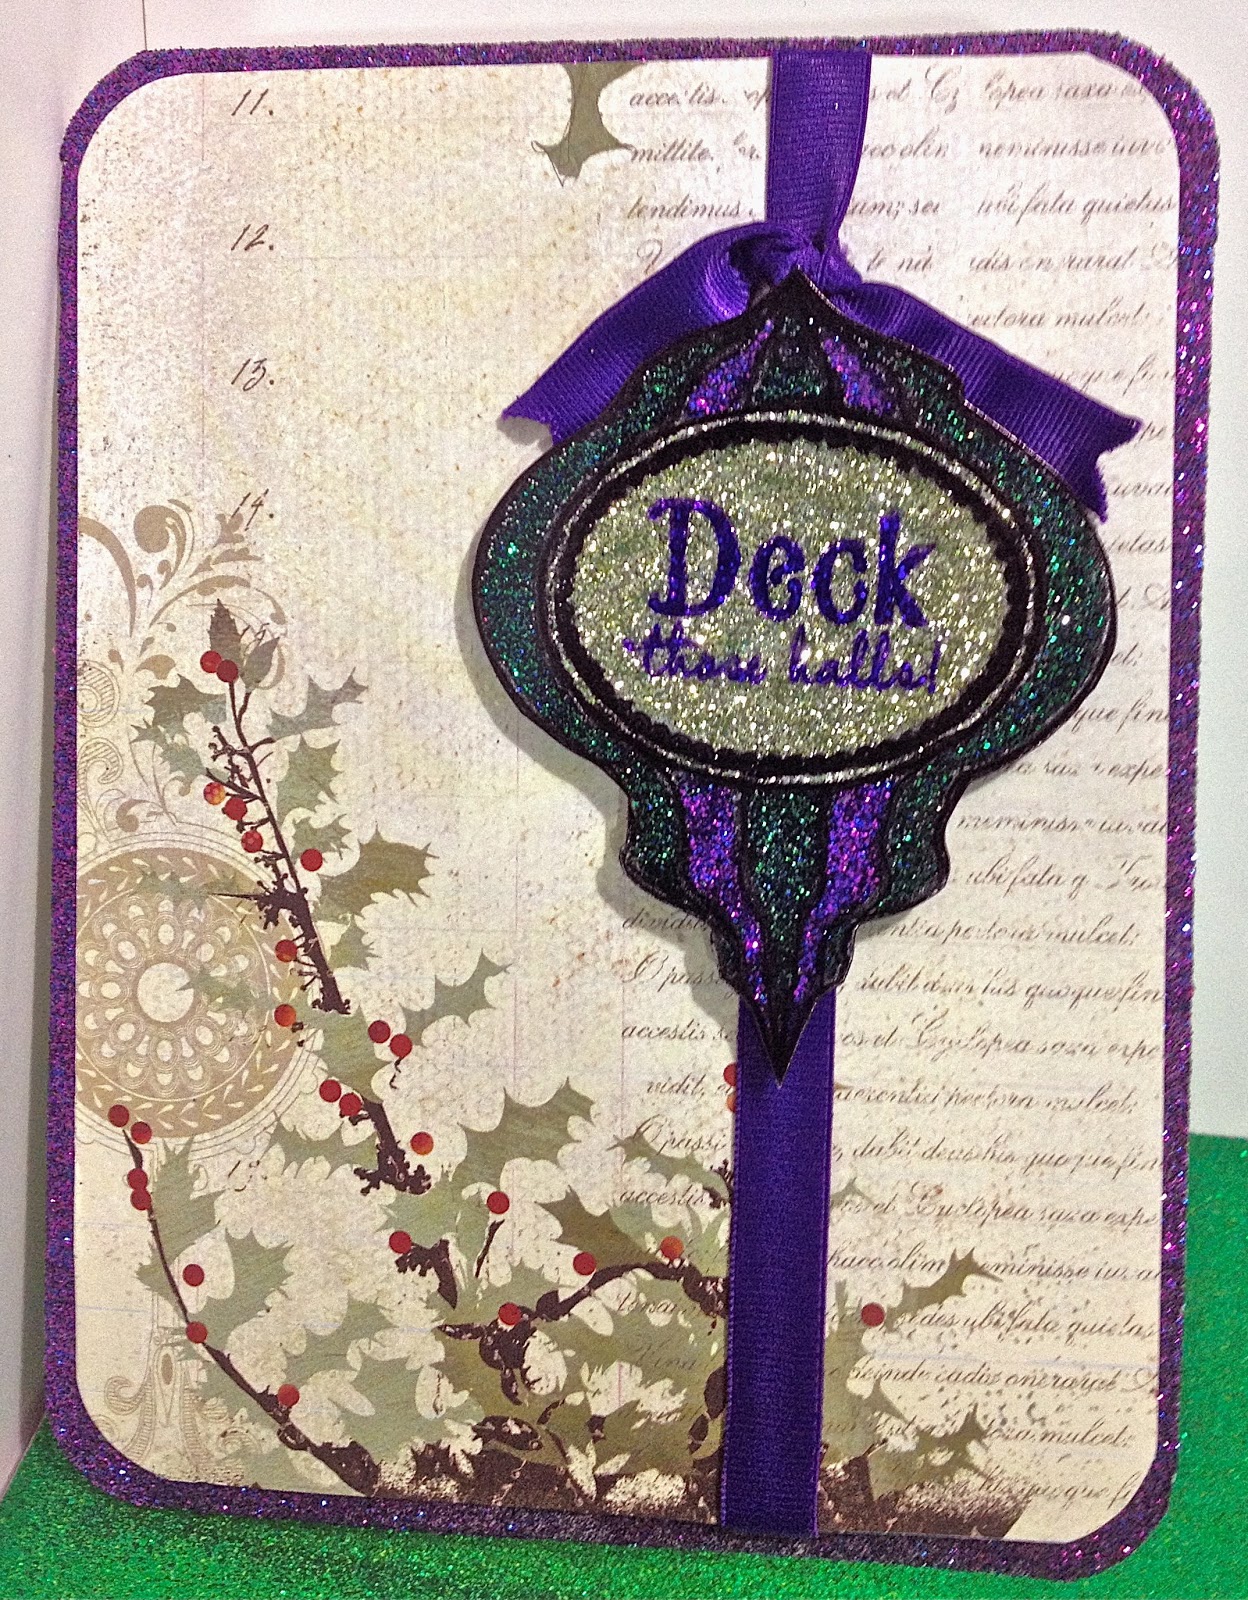
The ornament has the word Joyeux above Noel (from the Say It Loud Winter Holiday set) and if you click on this photo you might be able to make it out! I stamped the acetate layer with Fuchsia Pink StazOn ink and layered it over pink cardstock that I coated in iridescent glitter embossing powder. I tried stamping right on top of the embossed layer but it lacked definition, so the acetate jacket was the answer. Those two layers were added to a third fussy-cut pink layer that I ran a deep pink Copic marker around to create a border. The Spellbinders Frameabilities Classic Frame die cut was stamped with some sheet music and shaded with Antique Linen Distress Ink and highlighted with Memento Angel Pink.  
I created borders top and bottom with the ornate stamp from the Very Vintage Christmas set (still my all time favourite WMS stamp! Claire - when will you make a background stamp from that same design?)) and mounted them on more ribbon. I scored the pink base cardstock in a diamond pattern and dotted Diamond Stickles at each interestion to create some interest.

Very pink - not my favourite colour but I did my best to embrace the challenge! Thanks for stopping by today. Details on the WMS Christmas Card monthly challenge can be found in the WMS forum. I am also entering this card in the WMS sketch challenge.

Sunday, September 23, 2012

Butterfly Card - Up Close

All stamps: Waltzingmouse Stamps

Here is a closer look at the card I made recently for my mom's birthday. The base is white cardstock with rounded corners, I think 5 inches square. I created a clear jacket out of thick acetate and stamped an all over grid pattern across the front in white permanent ink. I stamped and embossed a large white doily onto aqua linen textured vellum, then die cut using a Big Scalloped Nestabilities die. I placed the doily on the white cardstock under the clear cover.   The big sentiment banner at the bottom is outlined in the vellum, too. Glitter and acetate are difficult to photograph!
In keeping with the clear theme, I stamped the center butterfly once on acetate and once on the same aqua vellum. I cut them out with scissors, then attached just the bodies together.
I curled the wings slightly with heat, applied glue and sprinkled on glitter. Once dry, I mounted to center of card.
The lower right corner butterfly is a single version of the center focal point, but I folded her in half so she appears to be flying.

The upper left butterfly is solid glitter on a die cut acetate butterfly, again folded in half for a side-profile view.  Thanks for visiting today!

Sunday, June 26, 2011

Bow Challenged!

Over on the Waltzingmouse Stamps Forum, Lynn challenged us to use a big bow on our card for the Christmas Card Challenge in June. I am definitely bow challenged. I even used a bow maker to help me out here, and still this bow was fighting me every step of the way. It is wide and slippery and even as I was taking a photo it seemed to be moving on me. And the ends are fraying right before my eyes! Sorry, Lynn, but I will only be making one of these! It makes me even more in awe of gals like Mona and Becca who make gorgeous bows with (seeming) ease.

I stamped with Sta-zon Metallic Copper on acetate and then backed the ornament with a purple die cut and then folded designer paper inside to line it. The mini ornament hangs straight in the center even though the bow was pulling it slightly askew in this photo. I am tempted to add a sentiment to the lower front right of this card, but I am still thinking about it.

I just discovered a new Christmas Card Challenge online and have entered this now in the Sparkle Creations Christmas Card Challenge to use a die cut in my card.

Sunday, April 10, 2011

WMS Sketch Challenge #42

It has been a good weekend. I have spent my time reading crafting books from the library and working on cards. Love it! I was supposed to be filing taxes, but I guess there is always tomorrow. How can you blame me?

Finally have had a chance to play in the Waltzingmouse Sketch Challenge. This is a weekly challenge but I don't seem to get around to it as often as I'd like.

Here's the sketch:

I used the opportunity to create one more birthday card. One can never have too many in one's stash! Our weather has been dreary and cold, so I think I was trying to urge spring along with this one.

I Cuttlebug embossed the top and lower portions of the designer paper using two different folders. I recently acquired the new Spellbinders banner dies and found a Waltzingmouse sentiment to fit. These stamps are polymer so I was able to curve the words to follow the banner.  The butterfly was stamped on acetate twice and cut out. I used double sided tape to apply three colours of glitter to the back of the images, and left the wings loose on the topmost butterfly. I created a narrow border around the panel with the same tape and applied lilac glitter and burnished it into the tape; a nice subtle border with a bit of pizzazz.


Thanks for visiting! Hope your weekend was just as fun as mine!

Saturday, February 12, 2011

Compendium of Curiosities Challenge 31

This week it's Rusted Enamel. I followed Tim's directions to create the background for my tag, but I think I need to practice more. The embellishment (above) was some silver Hodge Podge Hardware from Stampin Up! that I colourized with alcohol inks; I smashed the brad heads a la Tim. I stamped the postmark (Stampington & Company) twice, once on acetate and once on cardstock. I like the depth it provides. The passport image is from Oxford Impressions. I added some pen stitching to Tim Holtz's Tissue Tape.
Details for this weekly challenge are on the Studio L3 blog.

Monday, March 22, 2010

Easter Easel Card

Easel cards are fun. One thing I dislike about cards that are heavy with layers and embellishments - they tend to tip over. With the easel card structure, that won't happen. I used the lovely template and instructions provided by Penny Wessenauer.

I must confess after stamping for almost 20 years, it feels like cheating to use designer papers in something other than scrapbooks. For so many years stampers had to create their own backgrounds, and now the work is done for us! This paper is from a 7 Gypsies Nottinghill 6 inch square pad. I cut a 5.5 square panel. The main image is a Stampin' Up! stamp, and I like how the butterfly echoes the one in the pre-printed paper. I layered a second butterfly that was stamped on acetate and backed with glitter over the main image one. I left the wings free to flap a bit.

I used a clear button backed with more designer paper to serve as the stopper so the card front remains upright. A Spellbinders Fancy Tag was threaded with a ribbon and stamped with a Waltzingmouse sentiment.
Thanks for stopping by today. Happy Easter!

Tuesday, January 19, 2010

I LOVE YOU


This is a card I made for a challenge on the CreativeCuttlebuggers Yahoo group. It was a simple challenge: use the D'Vine Swirls embossing folder. The card measures 4.25 X 11 inches. I die cut some hearts out of clear acetate using the Spellbinders Nestabilities heart set, then embossed with the swirls. I coloured them with Ranger Alcohol Inks, and highlighted with rub on wax in silver.

I edged them with Krylon silver paint pen following this simple technique of Sharon Johnson's: Krylon edging tutorial . I was skeptical, but it really works well. Previously I would cut a V notch in my Krylon paint nib to have a groove to run the cardstock along, but with this method it is not necessary.

The burnished pewter cardstock I used for the "i" and the "u" is a favourite small piece of scrap that I have been reluctant to use up. I die cut the letters using the Blossom alphabet set from Quickutz. The black background is a paper placemat!