Showing posts with label Cameo. Show all posts

Friday, December 27, 2019

Foil Quill Hanukkah Card

Once a year I make a single Hanukkah card. This year I chose a file from the Silhouette Studio store (#236482) for the star. I cut it out of a sponged background I had created with various Distress Oxide Inks.

In Sure Cuts a Lot 5 Pro I imported the SVG file and traced the outside of the star shape and slightly inset the trace to get an aperture on my dark blue card front so the white background would show off the swirls.
Then I designed the words to go around the star using a single line font (Sisters Sketch Font) and "heat printed" them with my foil quill pen and We R Memory Keepers silver foil. Inside I used the same font to say "Enjoy the season."

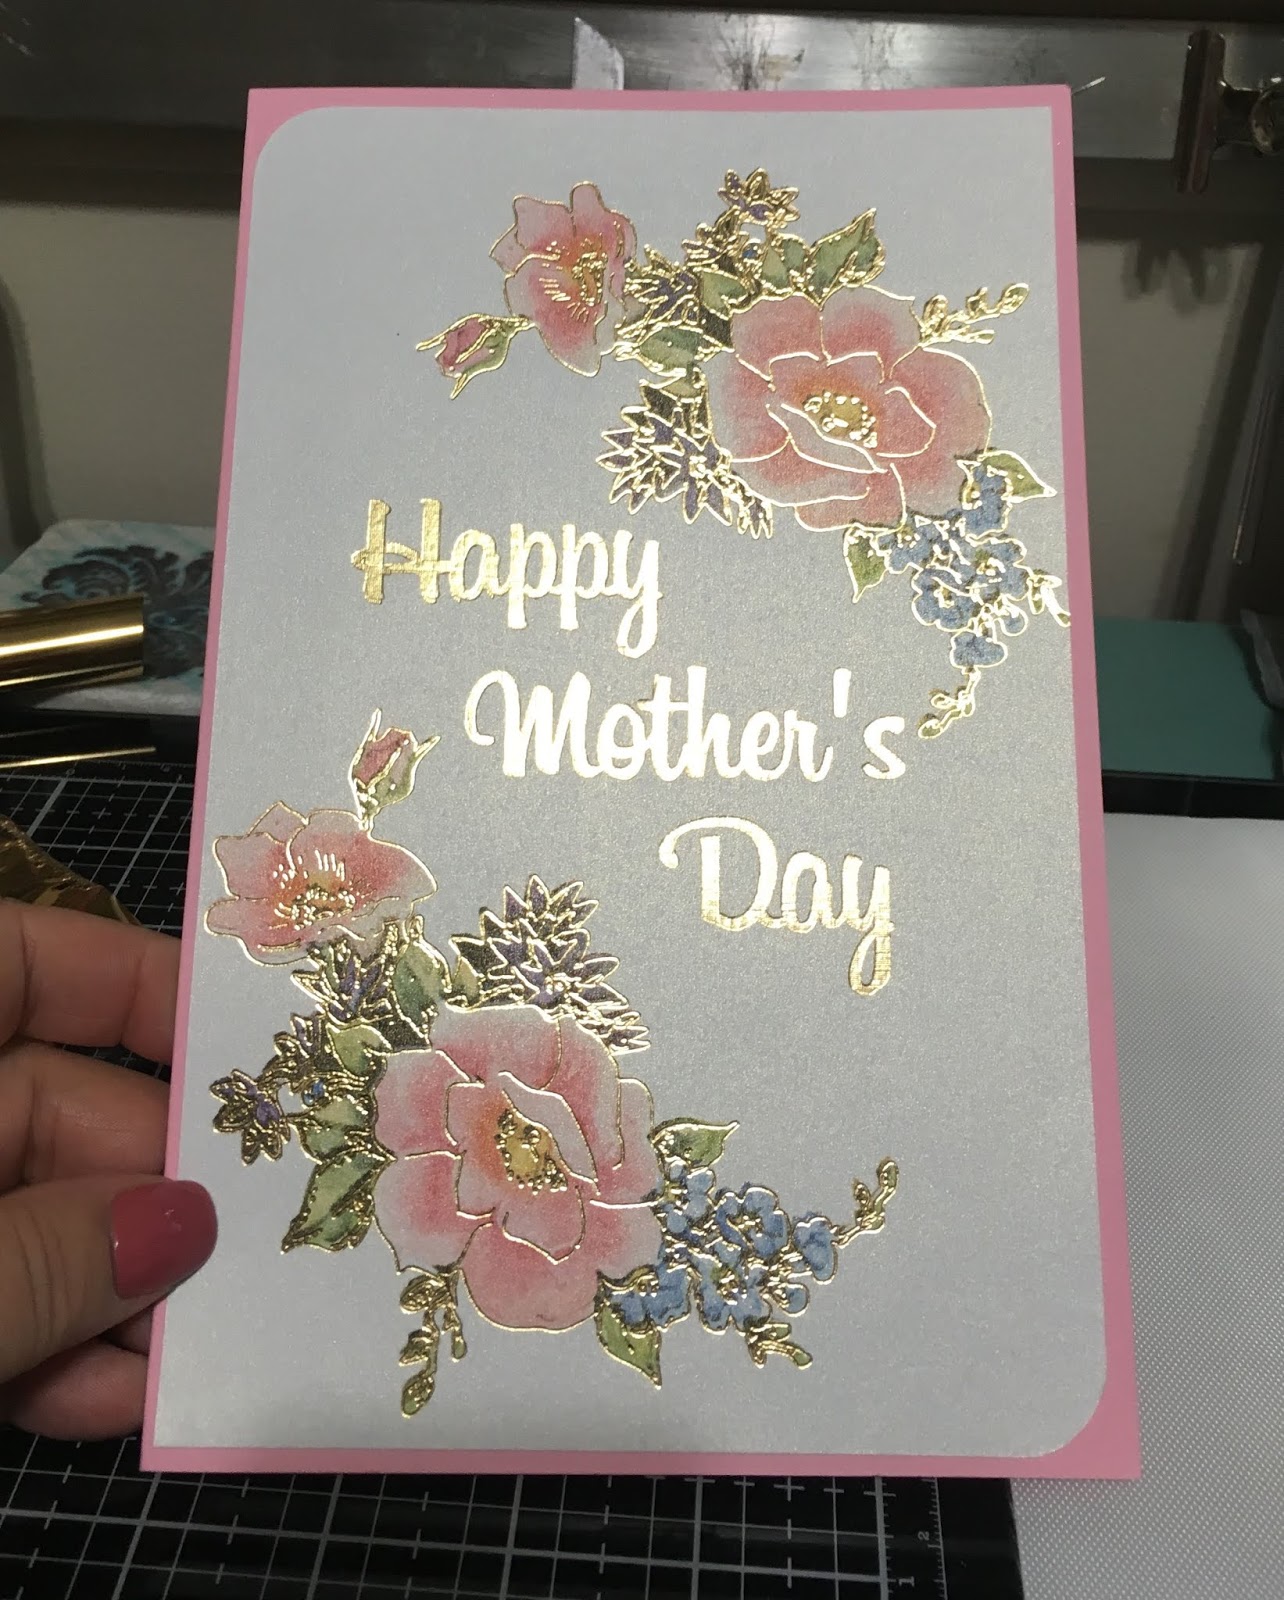
It was a fun challnge for me to develop this square card  incorporating the foil quill. It's not perfect, but I guess that's what keeps us humble and ensures that handcrafted look!

Wednesday, May 22, 2019

Foil Quill Explorations 3

Here is my third foil quill experiment. I made a Mother's Day card and gold-foiled both the floral print and the sentiment. I am indebted to the Silhouette School Blog for the tutorial that enabled me to get a good fill on the sentiment.


Foiled an envelope, too!

I printed this on Recollection shimmery cardstock that coordinated with the foil.


Foil Quill Explorations 2


Further adventures in with the foil quill. This time I made a card with silver foil highlights on a printed vintage floral image, and a foil-trimmed frame. Impossible to get a good photo, but I tried.


Foil Quill Explorations I


I recently started playing with a new tool, the WeRMemoryKeepers Foil Quill. This is a heated tip that replaces a sketch pen or blade in a cutting machine to enable one to apply heat activated foil to a substrate. In this case I used silver foil. These photos show how I added lines in the software to this floral print-and-cut image that the foil would adhere to.

Doesn't photograph well straight on.
At an angle you can see the silver better.

Lots of possibilities with this fun new tool!

Sunday, April 21, 2019

Happy Easter Box & Coaster

Happy Easter! I made this box (about 5 inches square) from a Dreaming Tree cut file. It went together easily.
The four flaps on this flat top box open to reveal a marble tile coaster I stamped and sponged with Ranger Distress Archival Inks. I had some black shredded paper from Sephora that I saved and it was perfect as cushioning.


I added a tag with a vinyl sentiment cut from a Suzanne Cannon calligraphy file from the Silhouette Design Store.
Thanks for stopping by today. I hope your Easter was enjoyable.


Thursday, March 21, 2019

Vectoria Designs Peter Rabbit

Recently I was in a swap in a Facebook papercrafting group. The challenge was to create a Cute and Cuddly Mini Album or booklet. I recently bought some paper designs from an Etsy shop called Vectoria Designs with a Peter Rabbit theme that seemed perfect. Here's what I sent my partner:

Here's the booklet opened to first page with pocket stuffed with tags and the first page of the well-loved childrens story. I included a pyramid box, also a Vectoria Design PDF.

Here is the book fully opened showing the back, the left panel that folds inside and the front cover at right.


Front Cover with ribbon tied up at fore edge. 
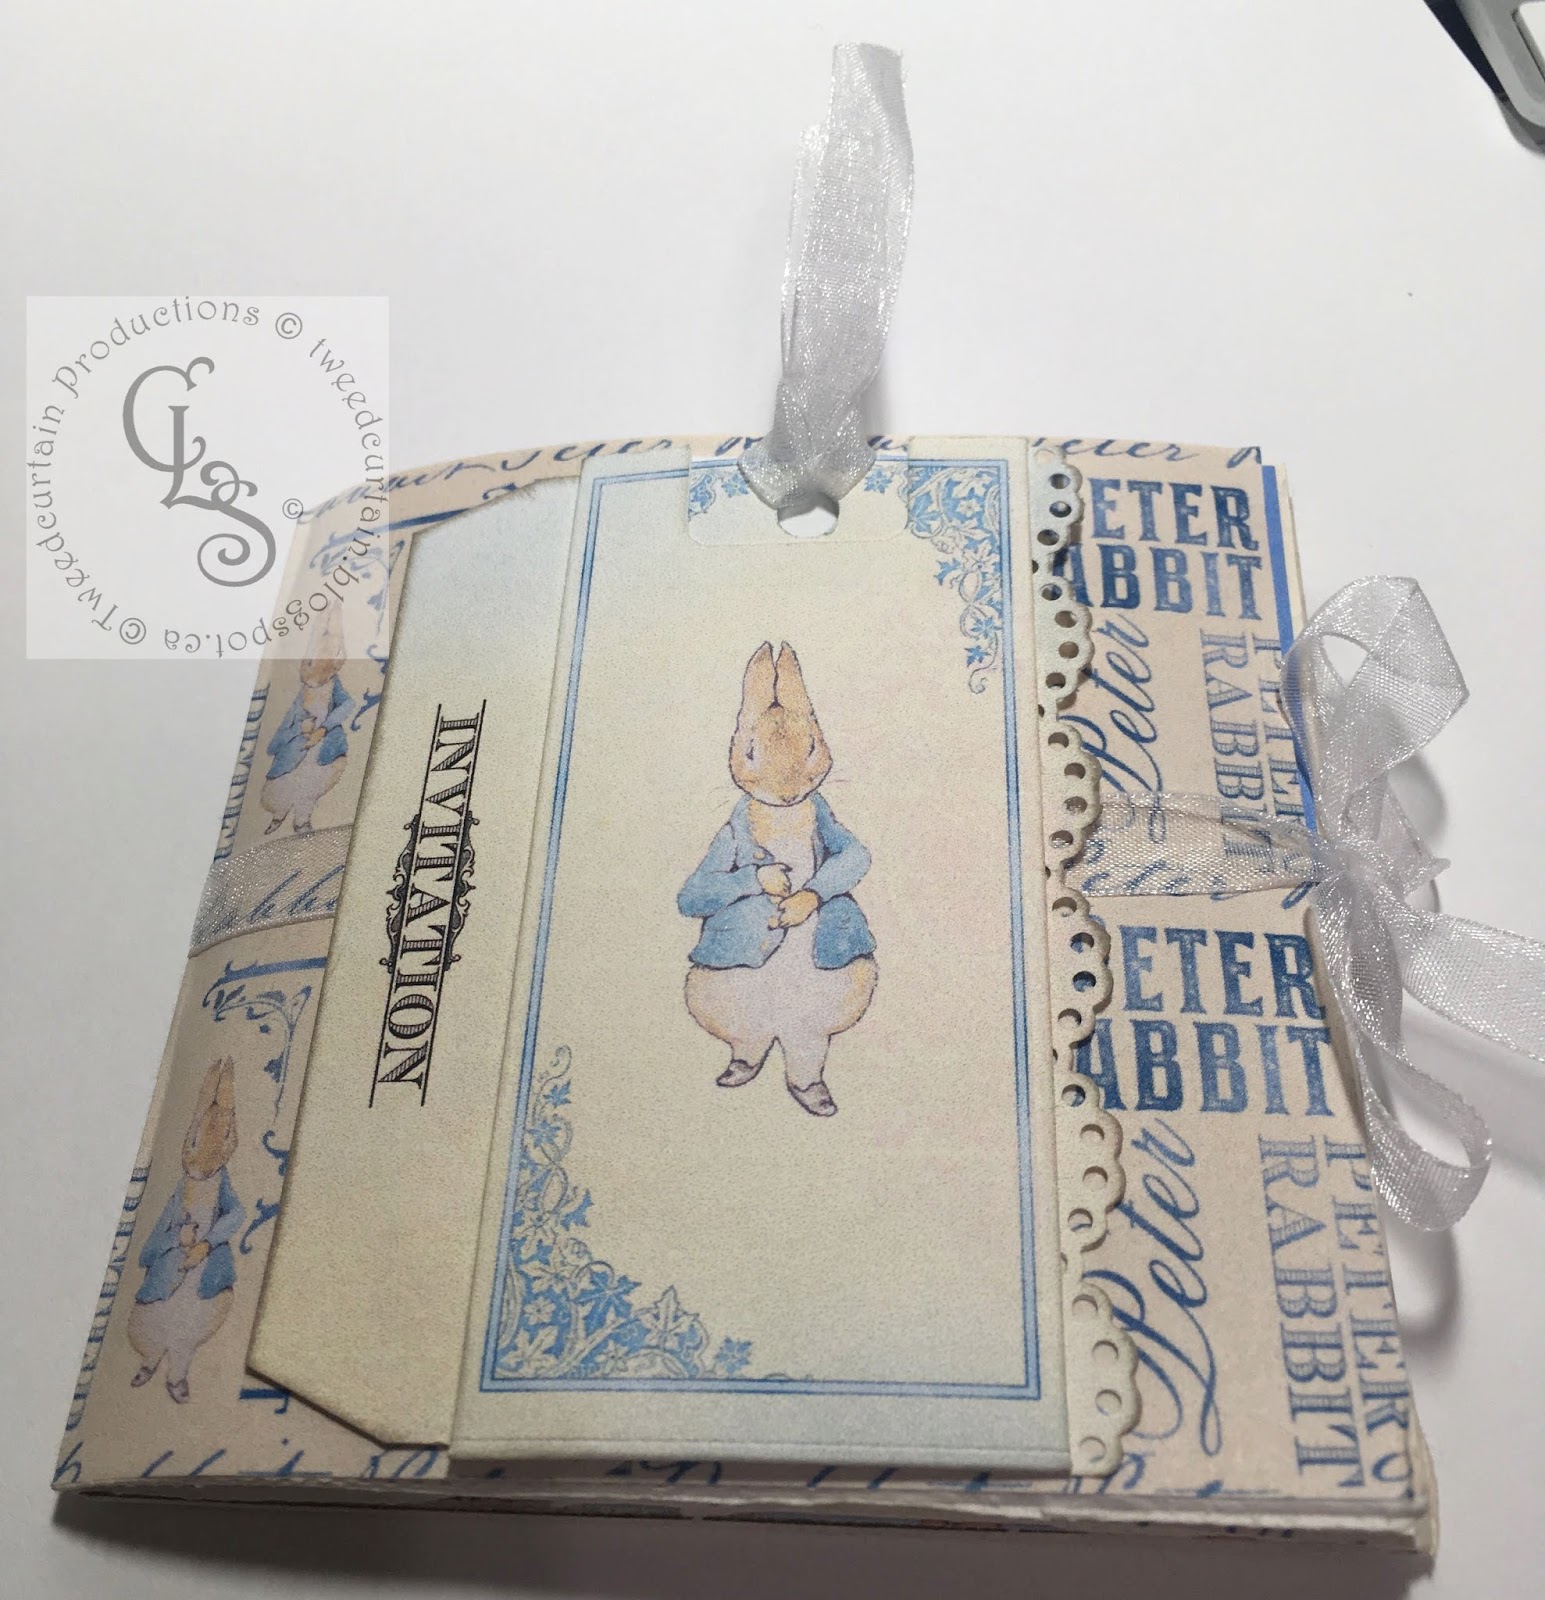
Personalized invitation tag slides up from pocket.
Inside left pocket with assorted tags.
Inside right page with the beginning of that favourite childrens story.
I did a little stamping on the center spread.
Another pocket with some stamped tags.


Some great vintage ephemera from Vectoria Designs.


Back cover. What a handsome fellow!


Sunday, February 17, 2019

Kerri Bradford This+That Kits


This post is just to capture some projects I want to remember having made. They are This+That print and cut kits from KerriBradford.com

A few years ago I bought a pair of Printer's Trays, 7 Gypsies brand, and made some seasonal inserts for them for my sister and my aunt. I backed each segment with magnets so they could just pop them in and out for the different seasons. I cannot find photos of all of the ones I have made, but I snagged these off of my aunt's Facebook page.

The one above is the most recent I made - it was for Valentine's Day 2019. I modified a couple of the segments with my own items because the original kit called for odd-shaped family photos and I wasn't sure if those would be handy. So rather than blanks, I created some of my own. I now have even greater appreciation for Kerri's design work and creativity!

Christmas
January - Winter
Spring
Summer
Summer - close up
Summer - close up
Summer - close up
Summer - close up
Summer - close up
Autumn
I have a few more to make (Thanksgiving, Family, July 4th). Sadly my sister lost hers in the great floods of 2018 and I can no longer find the discontinued trays anywhere. Kerri has also discontinued the kits in her shop (although she still sells the SVG portions), so it is the end of an era. I was glad to have the chance to make these while I could.