Wednesday, November 13, 2013

Cameo Castle and Chomas Inked Envelope

I am still learning the ins and outs of my Cameo machine. This is a birthday card for a four year old girl who is very much in the fairy tale stage. The card front features Waltzingmouse Stamps coloured with Copic markers.

Card measure 4.25 X 5 inches.
Here is the pop-up inside, made with a cut file from the Silhouette Online store:
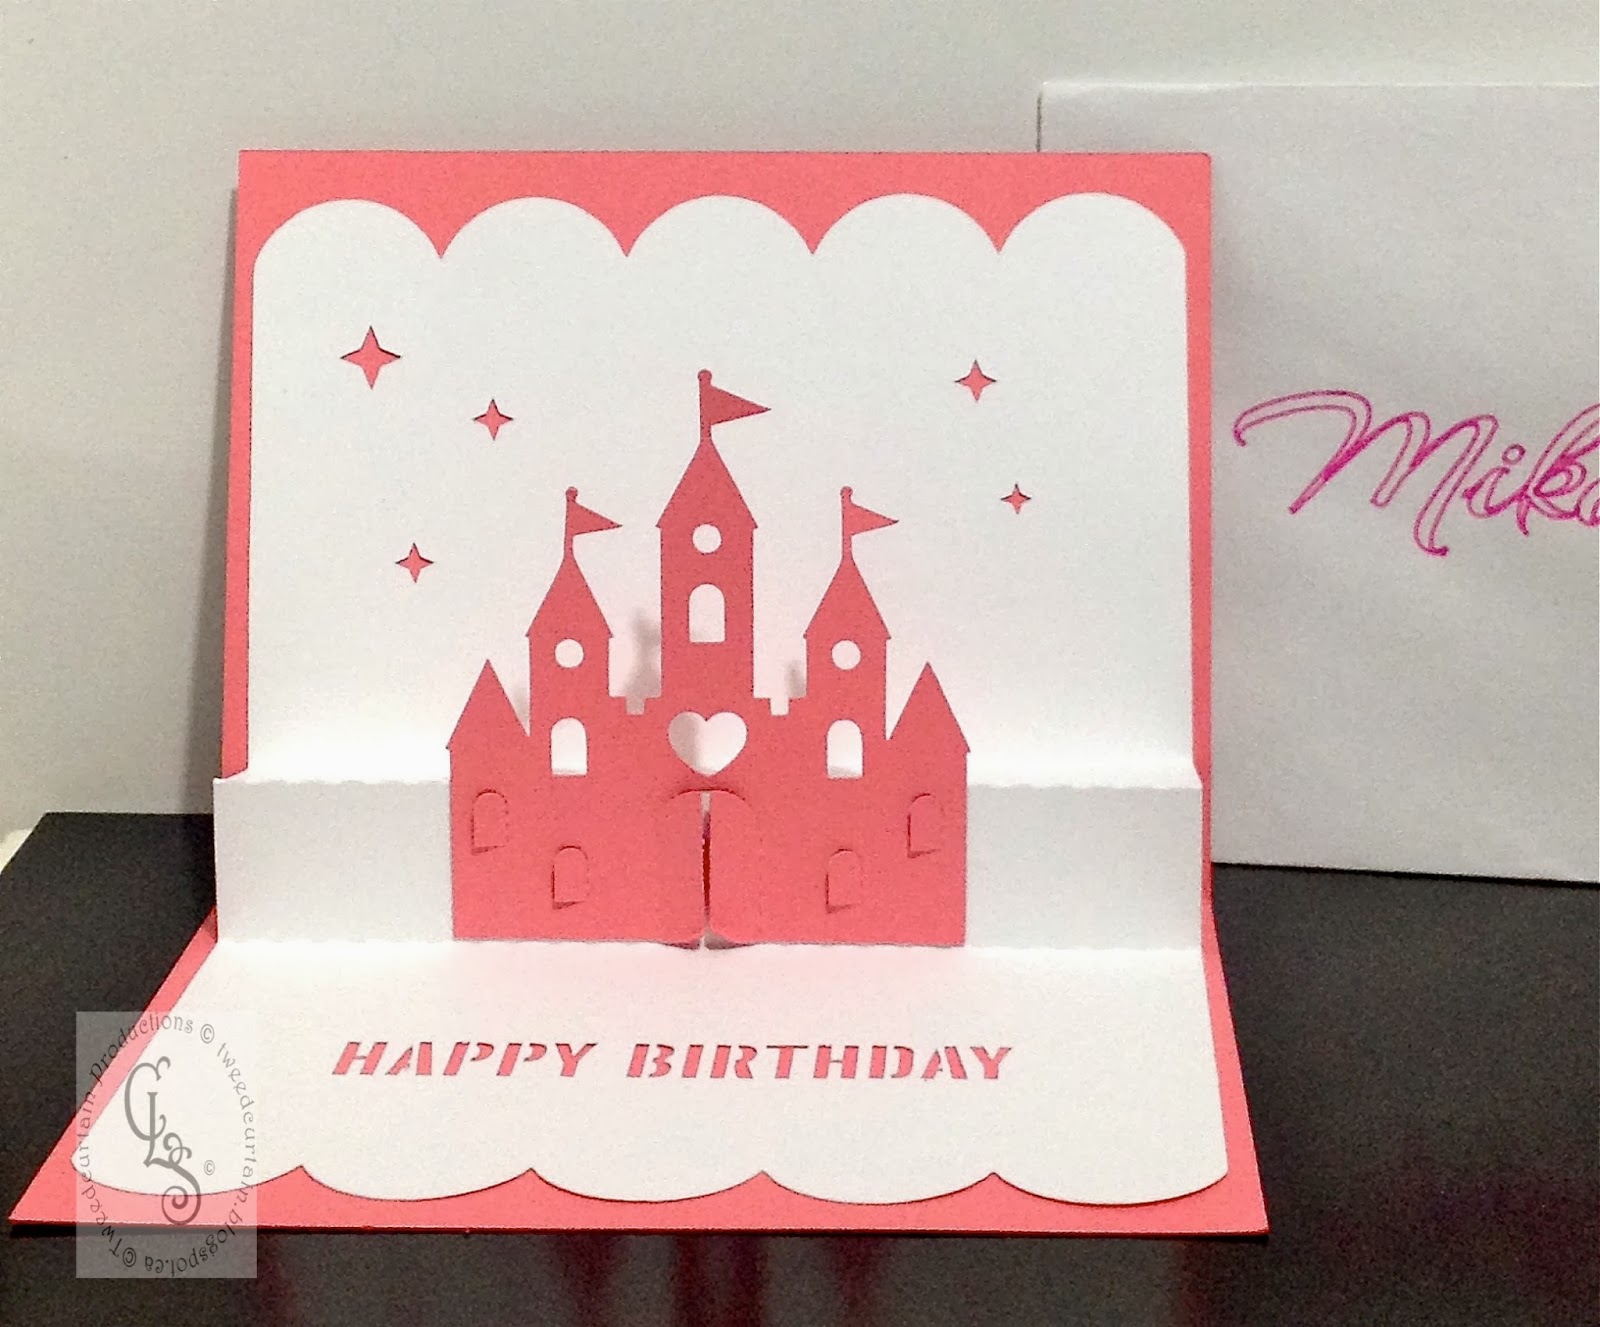
Look at that cut out greeting! I would never have the patience to do that with an Exacto knife. Because the castle doors open (the windows do, too) I wanted there to be a little surprise when Mikaela opens the doors, so I placed a butterfly gem inside:

I am entering this card in the Seize the Birthday challenge.

The really FUN aspect of this card for me was the envelope. I have abysmal penmanship from many years as a newspaper reporter when I would scribble notes in a notebook on my knee, so the addressing of a birthday card envelope has always been disappointing for me. Not any more! I used my new Chomas Creations pen holder in place of the cutting blade on my Cameo and used a Chomas pink glitter pen to address this:

Font: Arizonia
This was my first item made with the pen adapter and it was easy. I am looking forward to trying sketch files next!

Sunday, November 3, 2013

Acanthus and Poppy

I am so happy to be able to play along in the latest Waltzingmouse Fanatics Challenge - which is a colour scheme per below:

I recently purchased a couple of gorgeous Anna Griffin Cuttlebug embossing folders: Acanthus and Poppy. I used Acanthus for this card, creating a background by pouncing Ranger Perfect Medium ink overtop and chalking. I used three blues and a grey to chalk, but it all seems to blend into one!
I used Versafine Deep Lagoon ink to stamp the Victorian Fripperie border and monogrammed medallion and heat embossed in clear.
I applied Swarovski heat-set flat backed crystals to the elements. I was lazy and used Ranger Glossy Accents glue to affix them instead of getting out the hot wand. I actually have more faith in the Glossy Accents' holding power. I tried to catch the sparkle of these gunmetal blue gems but my iPhone just isn't up to the task.


The Poppy folder seemed to call for a more exuberant colour palette. 
I used various Distress Inks to colour the background for this Birthday Card, which I am entering in the Seize the Birthday challenge. You should check it out - lots of great birthday card ideas over there.
Thanks for stopping by today. I'll be back soon with more cards.


Wednesday, October 16, 2013

I {HEART} MY CAMEO!

I think technology is a beautiful thing when it can take the mundane and make it sublime. Over on the Ranger website they have a PDF of labels for the Distress Stains and Distress Paints. The labels are designed to be cut with a three quarter inch punch. I don't have one. Or they could be cut by hand with scissors. All 52! Ugh!

So I made a cut file from the PDF using my Silhouette DE software. In minutes my dots were printed and cut on my Silhouette Cameo and now I just need to glue them to my bottle caps. If I had been less excited and thinking clearer, I would have printed onto an adhesive backed label sheet to save even more time. Still, I am pretty happy with this time-saving project. 

Creative Chemistry 102 - Day 3

Distress Differently! That was the theme of Day 3 in the Online Card Class "Creative Chemistry 102." For better or worse, here are my six tags. The photo tinting is my fave - I think because of the Quietfire Design "Cherish" cut file. (Available here: http://www.silhouetteonlinestore.com/?page=view-shape&id=47957) Now it is back to the "laboratory" for me.

Smudge Stamping (background)

Brayered Stains
Photo Tinting. (That's me - age three!)
Faux Cracked Glass
Close up: Faux Cracked Glass. Collage under acrylic Fragment.
Distress Glitter Rock Candy


Distress Glittering (Black Soot mixed with Pink)


Thursday, October 10, 2013

Creative Chemistry 102 - Day 2

I have done all the techniques covered in Day 2 of CC102. I must say, I need to develop a better water flicking wrist action than what I've got going on right now! Tim Holtz makes it look so easy...

Day 2 was all about stencils, specifically Tim's Layering Stencils. I don't own any of those but I do have plenty of other stencils on hand so decided to make do. I think the first and last ones are my favourite effects - but I definitely need more practice! Can't write more - I am busy playing with the Day 3 techniques. Stay tuned. 
Mixed Media Layering

Machine Embossing With Stencils

Distress Embossing Through Stencils

Stencil Stamping
Stencil Sketching

Ink Monoprint
Paint Monoprint

Tuesday, October 8, 2013

Creative Chemistry 102


Tim Holtz is back at Online Card Classes with another Creative Chemistry series of classes. I made 5 of the 6 technique samples for Day 1. I am saving the sixth one for later when I get some more paint. Day 1 was focused on Distress Paints and their applications. I only have three colours, all neutrals:
Picket Fence, Tarnished Brass and Antique Linen Distress Paints


We marbled, we resisted, we altered and crackled. So much fun! While these samples are just that - samples, not finished projects - I decided to post them here anyways. I now have them tucked away in a binder with print outs of instructions affixed to the back, ready to inspire me down the road when I need a little creative oomph! Creative Chemistry 102 is turning out to be as good as 101. It's nice to play without worrying about creating a finished project.

I will share Day 2 samples once they are done.

Sunday, September 29, 2013

ATTN: Silhouette Cameo and Portrait Owners

If you own one of these machines, you will want to read the notice on the Silhouette America support web page and check your power adapter to ensure it is not displaying a counterfeit "UL" symbol. You can read about it here: http://www.silhouetteamerica.com/media/docs/public-notice-20130917.pdf

Now that I have passed on that bit of news, please enjoy this little project:


These are Martha Stewart wedding favour boxes that I dressed up with some Quietfire Design stamps. Thanks for visiting today!