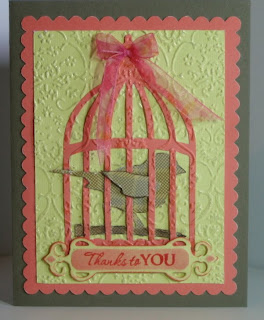
I tried something new - I affixed the cage die to a background panel with a few bits of tape and then ran both through the Cuttlebug machine together to emboss. This almost makes the cage look like it is embedded in the background. The embossing continues seamlessly from the cage on to the background (see below). I highlighted the embossed design with glitter pens. The bird was die cut from some recycled packaging from a set of Waltzingmouse Stamps, which included the sentiment stamp (Fancy Phrases). A Spellbinders Fancy Tag die cut holds the sentiment and a bit of stencilling with Distress Inks highlights it. By keeping the inner portion of the cage die unattached, I was able to set the bird inside. Sheer ribbon is the small crowning glory.
I quite like the colours of the various elements I used - the muted coral and yellow-green work well with the little plaid bird. I want to try this again using a light weight paper for the die, like tissue paper or rice paper; I think that would embed even more into the background. I can imagine this with flower die cuts scattered across a background. Thanks for taking a look!


10 comments:
Beautiful! I love how you ran the whole card through the EF. And the glitter! What a lot of work! Great card Charmaine!
I love this idea! Beautiful card.
That is lovey . great technique ..
CCB...Lis
very nice. it all worked well together. Nice idea with doing the two layers together.
WOW! You are really creative....I love it! Thank you for sharing.
This is beautiful! I love your idea for embossing and cutting and will have to try it. Love that little bird!
LOVE how you've stamped the wee bird. Lovely card!
Angela xxx.
Great job, love that embossing effect. And the colors are fabulous as well!
So beautiful, love the colours and clever embossing too! Pauline x
Very pretty card!
Post a Comment