
I think my favourite thing to do with my Silhouette Cameo is to make "die cuts" in cardstock and back them with tape, then burnish micro fine glitter into the tape. This fills the holes with glittery goodness that is soft as velvet and does not rub off.
This glitter technique is called Burnished Velvet and in real life these cards have a lot of wow factor. For the first one, the tulips, I backed the cardstock flower with white cardstock covered in double-sided tape and rubbed in iridescent glitter to create a glittery background. I wish this showed up better in the photo. (All photos expand if you click on them.)
 |
| Stamp: Stamp-it Australia |
The tulip design was a cut file from the Silhouette store, as is the peony below. Here is what it looked like in the store:
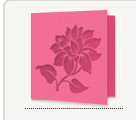
Here is what I made with it:
 |
| Stamp: Waltzingmouse Stamps |
I tried to do a little shading with a few pink shades of glitter. I need to practice that more. Basically I masked off sections of the flower (I used the Cameo to cut the mask from the tape liner) and sprinkled on the darkest hue in the centre, rubbed it in, then added the lighter sections.

I used a milkshake straw cut on a diagonal as a scoop to pick up the glitter and place it (mostly) where I want it. The technique is magical because the glitter looks a bit dusty until you burnish it with your finger. Then it comes to life and really sparkles.

It is Administrative Professionals Day on Wednesday so these two cards are going to the people in my office who really deserve much appreciation for all they do for all of us!
You can see more Burnished Velvet cards by clicking on that label on the right hand side of this blog. You can find out how to do the technique here: Be Creative tutorials.
1 comment:
Charmaine, I love the way you did the shading. Very nice. I'm sure they will be full appreciated. Sylvia D.
Post a Comment